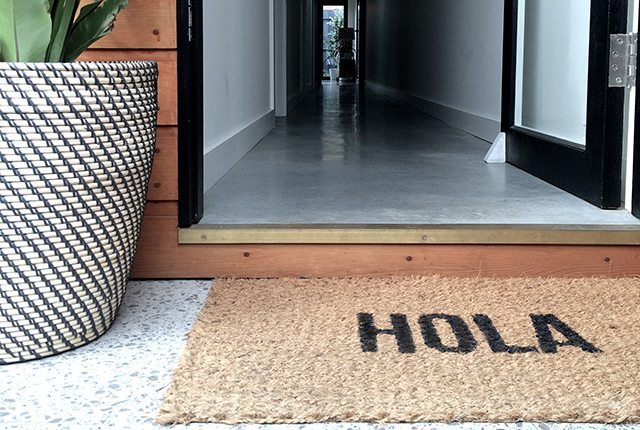

Entrances are the first impression someone has of your home so they can not be underestimated. A doormat allows you to express yourself, define your style to the outside world, as well as is practical for preventing dirt coming into the home. Unlike other entrance decor, even if you live in an apartment, you can still have a doormat to jazz things up.
This doormat was inspired by a lot of personalised ones I had seen on Pinterest and one I was going to buy from an online shop who didn’t ship to Australia. It didn’t take long and only cost me the $7 I spent at Ikea buying the doormat, as I aready had paint and got cardboard/printing from work.
I used acrylic paint as it’s all I had. 7 months later is coming off a bit so I’m going to go over it in the near future with some longer wearing paint.
Materials:
Computer with word or other writing program and printer
A3 paper
A3 cardboard
Cutting knife (I used a precision art knife)
Ruler
Glue
Pencil
Cutting mat
1 plain doormat made from natural fibres – e.g. Sindal from Ikea
Masking tape
Black paint
Paint brush – depending on the size of the font you choose, you want it big enough that it doesn’t take forever but still be able to do the detail and have control
Plastic or newspaper drop sheet
Instructions:
- Decide on the font, size and word you wish to use and create it in Word. For example I used Bebes Neue which is free to download off font sites. I wanted the end result to be a fair size of the mat, so I made the final font to 32cm x 15xm once printed out on paper. Make sure the word is centred horizontally and vertically on the paper.
- Print your word on to A3 (or over 2 A4 pieces of paper stuck together to be A3). Lay it over the mat and check you are happy with everything, you might have to adjust a few times.

- Once it is looking good, get the cardboard and glue the paper on.
- Using the ruler, mark the exact middle of each of the sides.
- Going as slow as you can, start cutting out the letters. This is the most important part so take care and go slow, especially on curves.
- Don’t forget the middle of letters, they’re important too!
- Once everything is cut your stencil is ready to go.

- Measure the middle of each side of the mat. In each centre put a strip of tape, about 10cm, so it goes to roughly the edge of the stencil. Mark the true middle with pencil over the tape. Essentially you’re creating a guide to line up the stencil against.

- Place the stencil on top of the mat and match up all the guides. Tape it into place. Find any letter middles you have cut out and place them inside their letters.

- Pressing down on each letter as you work on it, blot the paint into the voids of stencil. Make sure you thoroughly cover the mat without bleeding beyond the stencil.
- To do the letters with middles, hold the middle of the letter in place while painting around.
- Repeat with 2 to 3 layers of paint.
- Let dry completely.
- Remove the stencil and tape.
- Place at you favourite entrance way!


