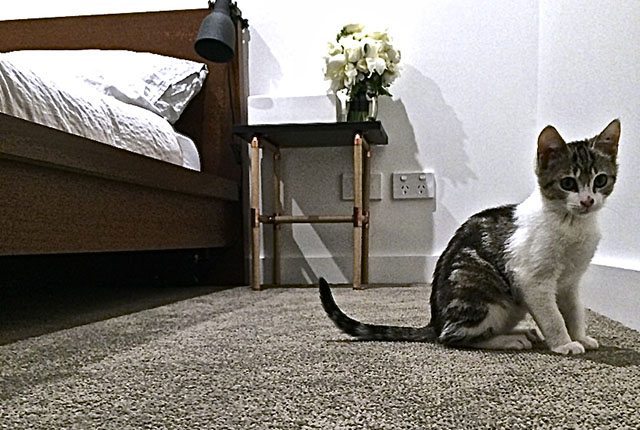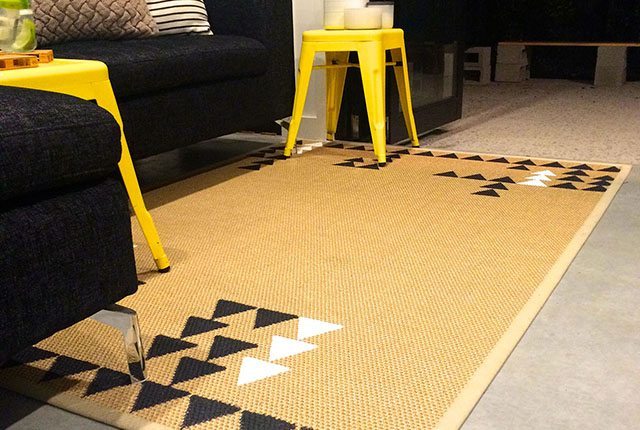
As previously mentioned in my DIY rug post, we have recently moved house. We are very fortunate to be proud owners of our very first guest bedroom – a feat that makes me feel very grown up and responsible indeed. This DIY copper and wooden dowel side table is actually the result of a huge DIY failure.
The original plan for this table was actually to be a big bench seat inspired by this post seen on HomeMade modern. This guy is actually ridiculous, he makes things look so easy and achievable! Unfortunately, being in little Melbourne, we just do not have access to all the parts so readily and cheaply available in the US. Although we have Bunnings, Mitre10 and Masters, I couldn’t find off the shelf screw-able copper pipping anywhere. Maybe I’m blind and it was there, but anyways, I decided I would improvise with doweling instead. Everything I needed for my version can be found at Bunnings.
I had spent about a month sanding, painting, sealing and glueing everything together and my bench was looking pretty awesome, cool and industrial. I was considering changing professions and becoming a carpenter. Well… until it came to sit on it. Unfortunately, it turns out that liquid nails and doweling just don’t have the structural integrity that strong steal piping does. Oh. Right.
Any-who, after a bit of moping and feeling like a failure, I decided I needed to scale back my ambitions a bit. So we ended up with a lovely achievable side table. I needed furniture for my spare bedroom anyway, and my benches could be made out of cinder blocks and wood instead ^___^. If anyone asks, I’m going to say both DIYs results were totally intentional and there weren’t any tears, tantrums or anything.
To be honest, even though it wasn’t how I originally intended, I learnt a ton, had fun doing it and I am very happy with the result.
Here is how you can make one too.
DIY copper and dowel side table

Preparation:
Sand all bits of wood and wipe off any excess saw dust. If you would like to paint the wood then this is the time to do so. Do at least two coats of paint making sure to let them completely dry in-between coats. All pieces of wood should also be finished with a sealant to protect the wood and make it easier to clean. I did 3 coats of Cabonates Polyclear. Make sure to follow the instructions on the can – basically sand in-between coats and make sure to let it completely dry before moving onto the next layer or construction. Make sure to avoid excess paint/sealant, as one it is dry it will stay that way. A little patience here and extra attention will make all the difference here.


Step 1:
Make the horizontal brace by gluing (with liquid nails) 2 of the 120mm dowels into either end of a copper tee. Wipe off any excess glue and check with a measuring tape that the ends have the same amount of dowel sticking out of each end – should be the same width as the 240mm piece of dowel. You might need to trim when dry if they’re not 100% perfect. Repeat so you have 2. Leave overnight to dry.
Step 2:
Repeat the above process with the 165cm dowels so you have 4 legs.
Step 3:
Glue the legs to the brace and to the 240mm dowel using the copper elbows. Make sure everything is absolutely square and that both the frames are exactly the same width apart. I measured about a hundred times. Make sure that tee of the brace is at a 90 degree angle to the rest of the frame. Leave to dry on the floor overnight.
Step 4:
Use the last 240mm dowel to glue the two frames together. Make sure all angles are square and level. Leave to dry overnight.
Step 5:
Attach the table top to the frame using the pipe joiners/clips and screws. Be sure to make sure everything is centred nicely before screwing.
Step 6:
Glue the copper end caps to the feet of the table, making sure everything is level.
Fin!
I don’t have many tools but I found my iPhone very useful for making sure everything was level as well as the handy measuring tape. The iPhone level can be found under utilities > compass.
Pictures of the end result of my guest room are below.
Bed, Lamp and bedspread are from Ikea. The beautiful cross blanket is from the wonderful New Zealand homeware online shop Jamie Kay. The couple in the pic is my good friend Joss Cronin from the recent travel post. The flowers were my bridesmaid bouquet from their recent wedding :))


Hi there! I LOVE this project! Thank you so much for sharing. It really inspires me :)
Thank you!